Negotiation As An Aspect Of Wargaming And The Variations OF Campaign Wargaming

Many wargames consist of just lining up two roughly or completely equal armies and fighting, across the table, a war of attrition. Admittedly this has its attractions, more so if the two armies are equal in points but not the same in troop composition; an army could, for example, be bigger but have lesser troop quality, in armor class, morale etc. It also is suitable for competition type events.
Another, less popular variation of wargame has unequal sides but with the weaker side having a strong defensive position or concealment.
Another possibility is rethinking the nature of 'winning'. A smaller, hopelessly outnumbered force, might have, as an objective, to inflict as much damage on the enemy as possible and, preferably, to last as long as possible before being wiped out. The Alamo and Thermopylae come to mind. In these cases the wargame objective is suicidal - last X number of moves and wipe out plenty of the enemy and that side can 'win' even if wiped out.
The opposite situation can be where a smaller force must escape the enemy to join another force elsewhere. It must get as many units off the board as possible but must decide which ones to sacrifice in rearguard actions. I played this objective once with the Major Dundee river crossing of Dundee's forces back to the USA.
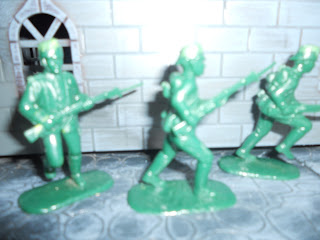
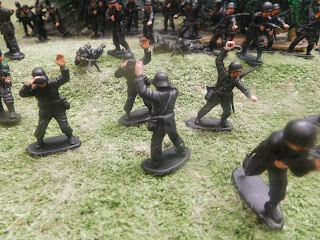
Mat and I have been playing a series of medieval-Renaissance fantasy campaigns. He has Bogavania and Fezia and I have Beerstein. Third party countries also exist. Patra, for instance, is an ancient society founded by Mark Anthony and Cleopatra. (I love the concept of countries being from different times and technologies but encountering each other). The thing with a campaign is that many different scenarios arise accidentally, particularly as map movements of armies are secret. Mat and I use hardware screw drawers with the clear plastic parts painted over but numbered to correspond with map hex numbers. We move two hexes on road and one off road or three on road for cavalry and two if off road. Some hexes are impenetrable of penetrable a t a cost. When one's bits of paper meet enemy bits of paper a tabletop battle is arranged. However, a vastly outnumbered force has a chance to withdraw. We calculate the chances and dice for it. If the larger force has cavalry the percentage chance decreases.
Another variable is that our generals and characters were diced for at the beginning of campaigning to decide their qualities. One of the percentage rolls involved 'boldness' or 'caution'. At the moment we calculate it under 'caution'. That means that a very low score on caution means we could have a General Custer character on our hands. Custer's boldness served him well in the ACW and earlier Indian Wars battles until he reached his little Big Horn.
A character might also have either low or very high Battlefield Intelligence. We do weight our initial rolls so we don't have complete imbeciles in command of armies, but maybe we should not have what with political appointments. Anyhow, a bold commander with high BI might be less likely to do completely stupid things. The player might also want something to say about his actions. For this reason, we say a very bold commander can generally be expected to go on the offensive, but he might still have some caution about it. We also sometimes make a dice roll to see if the general or hero must lead a charge, within a certain number of moves. This involves some negotiation between players, or the circumstances can be rigidly written down. For a general to lead a charge can be wonderful for army morale but catastrophic if he is killed!
In fact, we have a list of possible outcomes for a general being killed, that range from the army making no more forward movement until a new general is chosen in x number of moves, to full scale retreat or, if retreat is not an option, surrender.
Getting back to tabletop scenarios our next battle involves my small force besieging an enemy force but having insufficient numbers to easily take the castle. Furthermore, Mat has a relief force coming, which will mean I am outnumbered. My advantage is having two cannons already set up from a previous battle whilst Mat has a single one which will come on from reserve from the relief force. His other advantage is his general will have higher BI, which means he can make me reroll for who sets up first and who has first move. In addition, his sorceress will have recovered consciousness whilst mine is still knocked out. After we finish Map Move 8 and go into Map Move 9 I also have a very strong relief force coming into the same hex. What this means is my smaller force must hang on until help arrives, that is if my commander does nothing silly. In other words, generals have a certain degree of free will.
Paradoxically, they also have some limitations set by their orders. Directives from the king or commander in Chief are supposed to be followed, within reason, until new orders arrive. New orders can be sent by courier or by the arrival of the uber commander himself.
Now, I promised, in my title, to discuss 'negotiations'. Later I thought I could mention negotiations between players. However, I had in mind something else; there are times when it is wise to avoid war with a neighbor, especially when one is already involved in a war with another neighbor!
This initially came up early in our campaign. After we did our dice roll for circumstances it turned out that instead of fighting 'each other' we each had to fight 'someone else'. I had to fight off an invasion from Fritzerland to my South and Mat had to fight off an invasion from his Southeast, by Patra. The reality was we each took over the part of the third-party enemies. Meanwhile we could have also fought each other but elected to have a peace for six moves. During this time Mat sent a Bogavanian force through my border land, in order to reinforce his castle in the North. It was detected by a small force of my Great Sword mercenaries. Rather than fight Mat was given the option to withdraw, which he did. He could have destroyed my small force but a full-scale war with Beerstein at that moment would have been inconvenient.
Despite initial success by the Fritz they were eventually damaged enough to call for a settlement. They had infiltrated and taken a castle but were isolated and I had occupied some of their territory and also defeated another siege. I wrote down set of circumstances for peace with the most likely weighted in success. In the end the dice roll favored a return to status quo.
However, the Patrans achieved a roll of victories including capturing a castle and the Fezians did not penetrate Patran territory. A series of scenarios for peace were diced for. The outcome was the Patrans kept the land they took - two hexes including a castle.
More recently we rolled our random events 100-sided die and those devious Patrans attacked Fezia again! Mat was in the process of sending a small force to receive POWs from the earlier war with Patra. The random event was the Patrans raided into two border hexes. We rolled dice to determine which hexes these were. We also made a list of peace-making agreements, assuming Mat did not want to fight Patra. The least harmful for Mat was that the Patrans would keep one of the hexes it raided into but this had only a 10% chance of working. It did! it was also just a desert hex. This begs the question, why would this be enough to buy off the Patrans? The possible backstory is there is a sacred Sphinx monument there and a source of a substance, under the ground, but seeping to the surface, for making Greek Fire.
Another source for negotiations is prisoner exchange. Some of my commanders have a very low 'Kindness' rating so they have a history of executing captives! However, where both sides have captured characters there is a good chance of straightforward POW swaps.


Interesting topic! I have long thought that, although battles are by nature competitive and combative (us versus them), they do have a collaborative or cooperative feature as well between the contending forces. Both sides, like Tweedledum and Tweedledee, have to 'agree' to have a battle.
ReplyDeleteExamples of uncooperative army commanders defeating aggressive strategies might be found in the 'Fabian' strategy of Quintus Fabius Maximus Verrucosus, surnamed Cunctator. A similar type of campaign was carried through in 1744 by the Austrian Feldmaschall Otto Ferdinand Graf von Abensperg und Traun against Frederick II, which forced the Prussian to abandon his Bohemian project without a battle. Unfortunately, he wasn't around long enough to keep a curb upon the bellicose follies of Prince Charles of Lorraine.
Cheers,
Ion